


Security error and shutdown options are not displayed
Many Windows 11 users have reported that whenever they try to restart the system using the CTRL + ALT + DEL buttons if the system is not responding. But they can’t do it because an error appears on their screen saying “Security and shutdown options are not displayed.” If the user wants to restart / shutdown the system, they need to press the button on the system power switch. If you are also facing this error and at the same time it occurs on the screen that you cannot do anything, this post will help you to solve this problem in many ways.
Solution 1: perform DISM and SFC scan
We believe that the reason behind this error may be the corrupted system file. So we are running SFC and DISM commands that scan the system for corrupted files and also resolve the corrupted files. Follow the simple steps below on how to do it.
Step 1: Press Windows + R keys together on your keyboard to open To run dialog box.
Step 2: Write cmd in the run box and press CTRL + MAYÚS + Get into keys together, which opens the command prompt as administrator.
Step 3: click Yes at the UAC request window to continue.
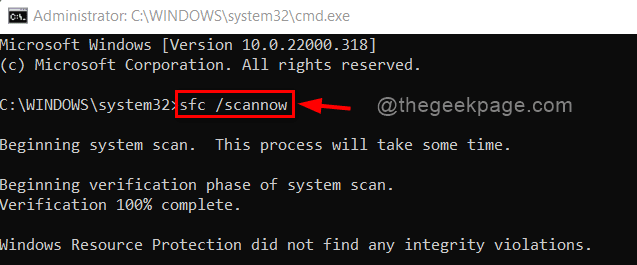
Step 4: Copy and paste the following command in the command prompt and press Get into wrench.
sfc /scannow
Step 5: After the scan is complete, if any files are corrupted, it will be resolved; otherwise, it shows that no integrity violation was found.
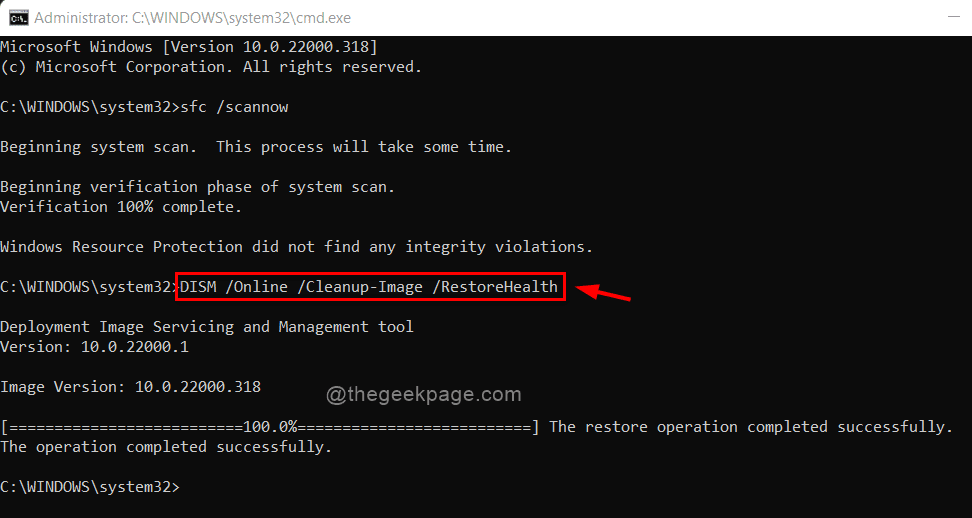
Step 6: Now run the following command at the command prompt if the problem persists while pressing the CTRL + SHIFT + DELETE keys.
DISM /Online /Cleanup-Image /RestoreHealth
Step 7: Upon completion, you will find the Restore Successfully Completed message at the command prompt as shown below.
Step 8: Close the command prompt and try to check if the problem persists.
Hope this method has solved your problem. If not, try other methods below.
Solution 2: Reset using Winsock in safe mode
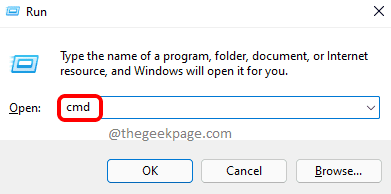
Step 1: Press Windows + R keys together on your keyboard to open To run dialog box.
Step 2: Write msconfig boxed run and hit Get into wrench.

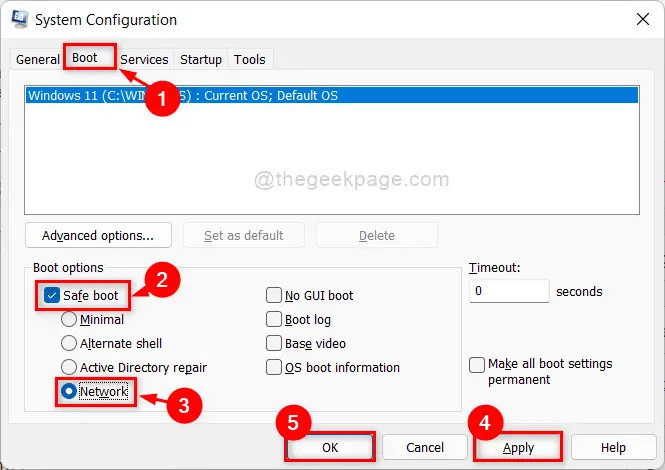
Step 3: go to world tab and check the Safe boot check box and select Network radio button.
Step 4: click Request and OK to make changes as shown below.
Step 5: Then restart your computer and it will boot into Safe Mode with Networking.
NOTE: – After completing the steps below, open the system settings window and uncheck the box safe boot checkbox to return to normal way.
Step 6: Press windows + R keyboard keys to open To run dialog box.
Step 7: Write cmd in the run box and press CTRL + SHIFT + Enter keys together to open command prompt as administrator.
Click Yes in the UAC message to continue.
Step 8: Write reinicio de netsh winsock at the command prompt and press Get into wrench.
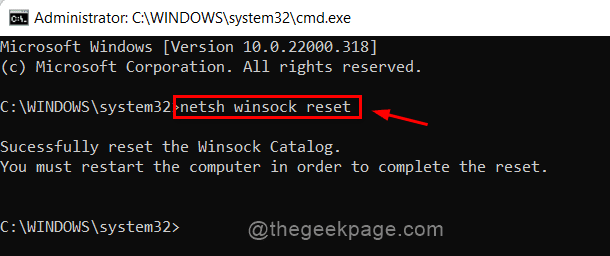
Step 9: Close the command prompt and reboot your system once.
After rebooting, check if the problem persists.
If this method didn’t work for you, try the next one.
Solution 3: do a clean boot
Step 1: Make sure you are logged into your system as an administrator.
Step 2: Press Windows + R keys together to open To run dialog box.
Step 3: Write msconfig in the run box and press Get into wrench.
If you are prompted for the UAC window, click Yes continue.
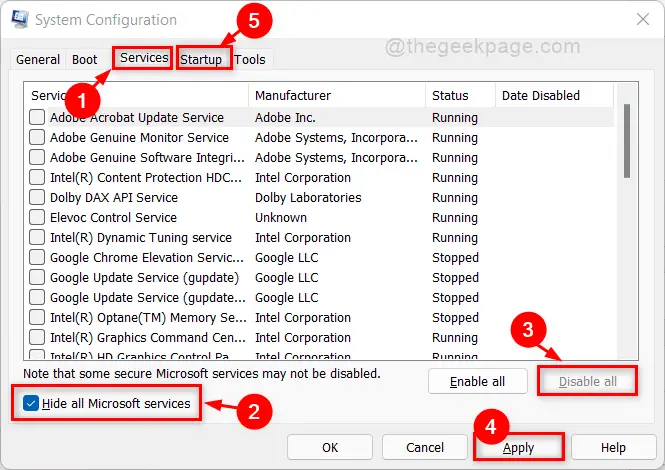
Step 4: go to Services tab and check the Hide all Microsoft services box.
Step 5: Then click Disable all and then click Request to make changes.
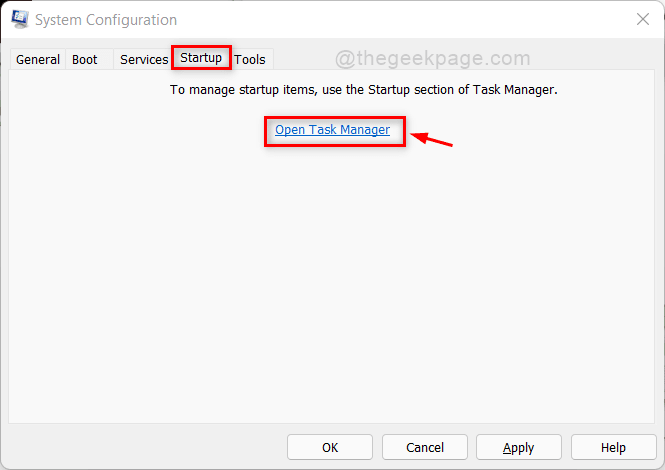
Step 6: After applying, click Start up tab as shown in the following screenshot.
Step 7: make sure Start up the tab is selected and click Open Task Manager link as below.
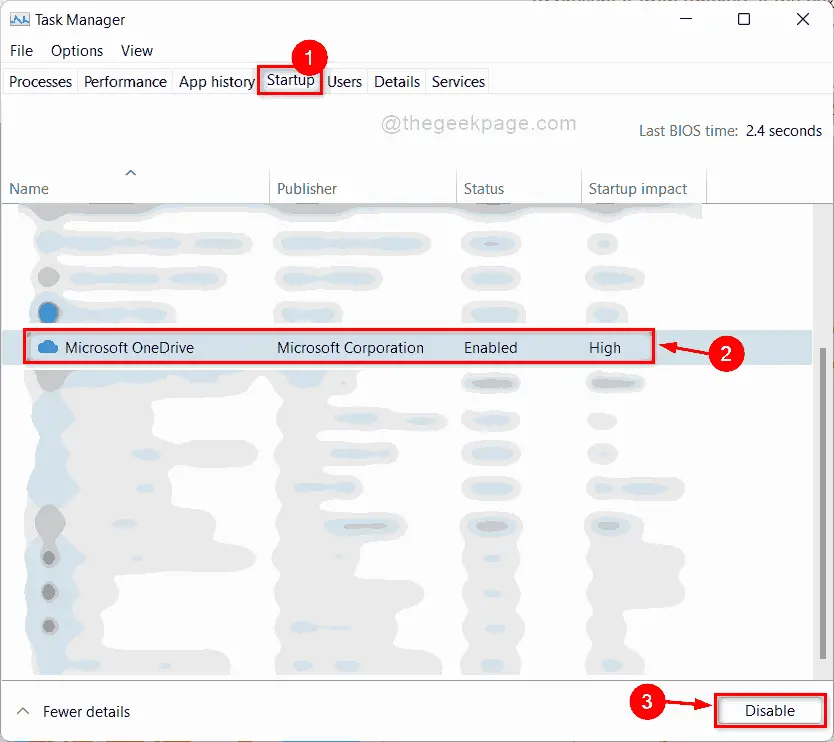
Step 8: Choose the application you do not want to start at startup and click Deactivate button.
Do the same for all the applications you want.
Step 9: Close Task Manager and other open windows and restart your system.
Check now if the problem persists.
Solution 4: perform system restore
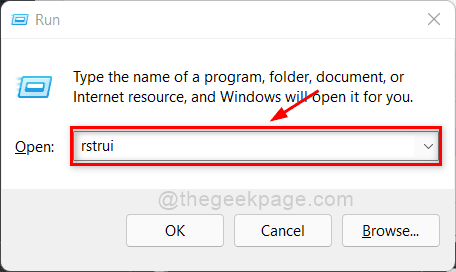
Step 1: Press Windows + R keys together on your keyboard to open To run dialog box.
Step 2: Write rstrui in the run box and press Get into wrench.
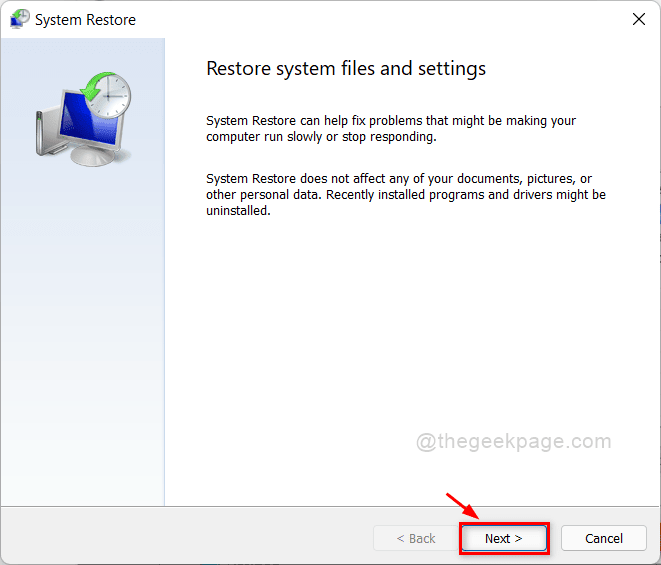
Step 3: click next in the System Restore window to continue.
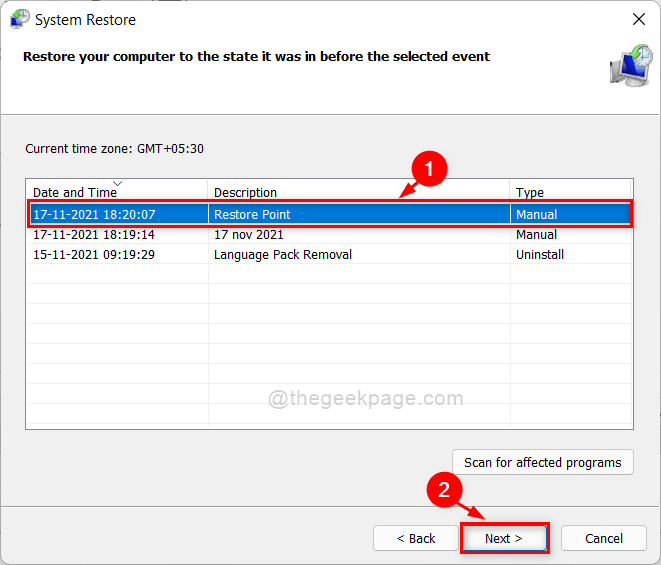
Step 4: Next, select the restore point from the list shown below in the window and click next to proceed.
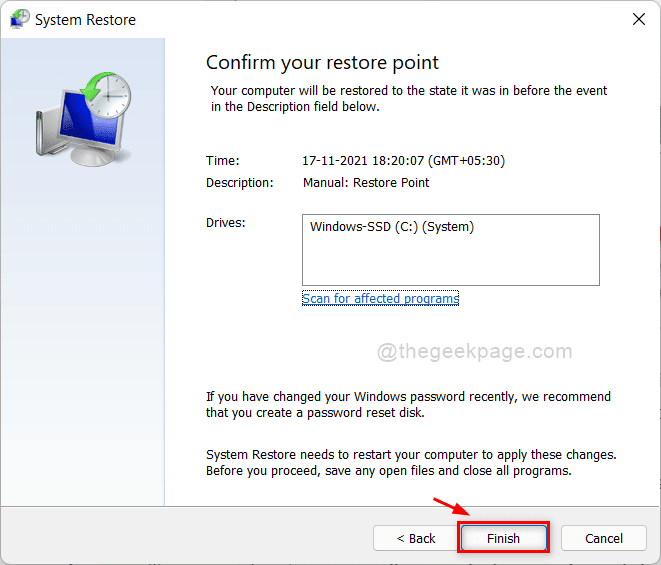
Step 5: Finally, click End up to start restoring your system to the point you have selected.
NOTE: – Click on Yes in the UAC message if you are asked on the screen to confirm.
Hope this fixes your problem.
Solution 5: uninstall any Internet security software
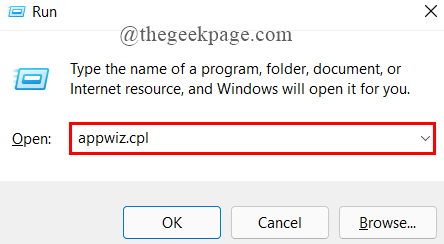
Step 1: Press Windows + R keys together on your keyboard to open To run dialog box.
Step 2: Write appwiz.cpl in the run box and press Get into wrench.
Step 3: select internet security software, such as Advanced security VIPRE and right-click on it in the Programs and Features window.
Step 4: click Uninstall the changes in the context menu as shown below.
Click Yes in the UAC message to continue.
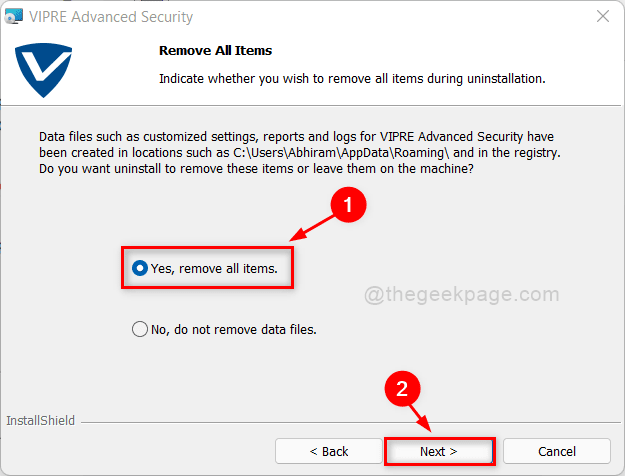
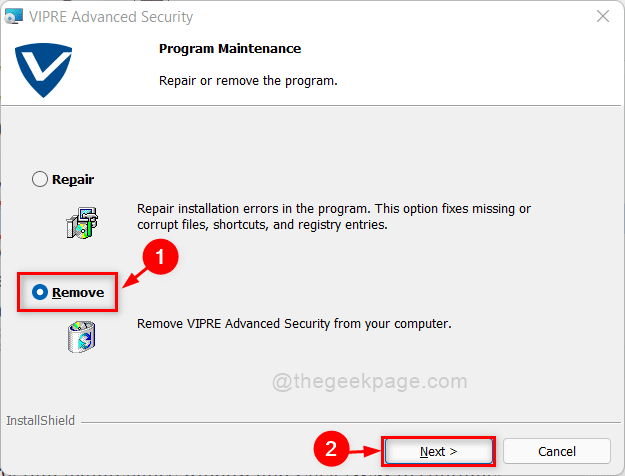
Step 5: select Remove radio button in the program maintenance window and click next continue.
Step 6: click Yes, remove all items radio button and click next.
Step 7: click Remove to begin uninstalling VIPRE advanced security software.
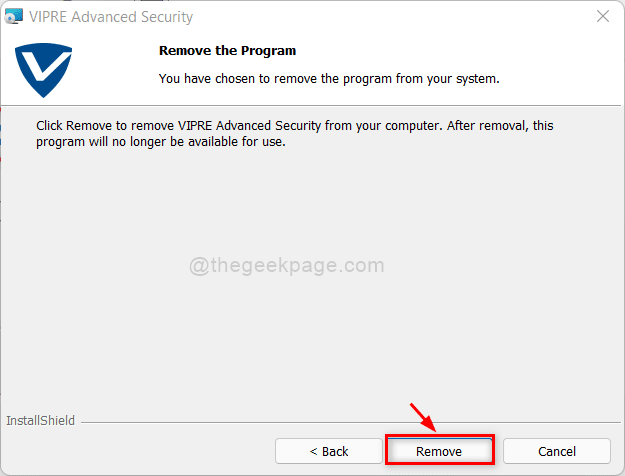
NOTE: – The uninstallation may take several minutes, so please wait patiently for the uninstallation to complete.
Once it has been successfully uninstalled, try to check if the error persists.
Hope this solves the problem.
Solution 6: clean install of Windows
If none of the solutions listed above worked for you, your system has most likely suffered serious damage. As we can see, the only option to get your machine back on track is to perform a clean installation of the Windows operating system. You won’t lose any of your data as you can save all your data and partition your hard drive for Windows installation before doing a clean install. Here are some quick and easy procedures for a clean installation.
Step 1: Download the Windows ISO file and save it to your desktop.
Step 2: Mount the ISO file on a USB stick or DVD.
Step 3: Open the Pen drive / DVD by double clicking on it.
Step 4: Then find the setup.exe file and double click on it.
This will start the cleanup / repair installation process from here and go through the on-screen instructions to complete the Windows installation.
After the installation is complete, try to see if the problem persists.
We hope this has definitely solved your problem.
That’s it guys!
I hope this article is informative.
Let us know which solution worked for you in the comment section.
Thank you for reading.
Related posts:
 How to access Steam games without an internet connection
  How to view FPS with Xbox Game Bar in Windows 10: Steps Made Easy
  Hacked account? How to check and remedy
  How to make video calls from WhatsApp Web
  How to increase the RAM memory of a desktop or laptop + Tips and Tricks
  How to organize your YouTube subscriptions into categories
+ Tips and Tricks
How to organize your YouTube subscriptions into categories
+ Tips and Tricks


