


System restore error 0x8007025d on Windows 11/10
System Restore is a life-saving tool for Windows users as it can recover your computer from any fatal errors. But what if System Restore stops working and shows this System Restore Error 0x8007025d? You cannot perform System Restore successfully without manually solving the problem.
Solution 1: make sure system protection is on
Before doing anything, make sure that System Protection is enabled on your computer.
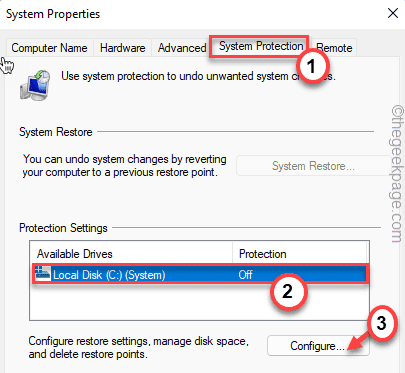
1. First, write «sysdm.cpl”In the search box.
2. Then tap «sysdm.cpl ”to open System Properties.
3. When it opens, navigate to «System protection” tab.
4. Then select the C: drive from the list.
5. Then touch «Set up …”To configure system protection settings.
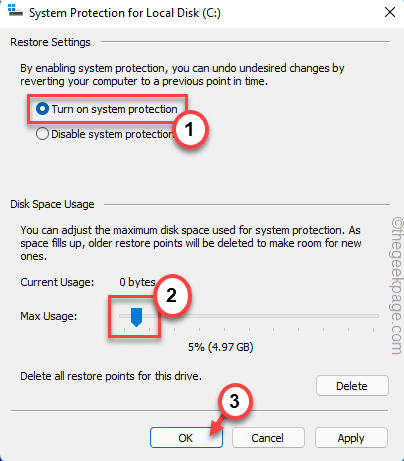
6. Now, change the «Turn on system protection“.
7. Simply slide the button «Maximum usage”Settings according to your choice and the available space you have.
8. Then click on «OK”To save the changes.
After that, try to create the system image backup. This time it will be created without the error message.
Solution 2: run System Restore in Windows RE
If running normal System Restore doesn’t work, try running it from the Windows recovery environment.
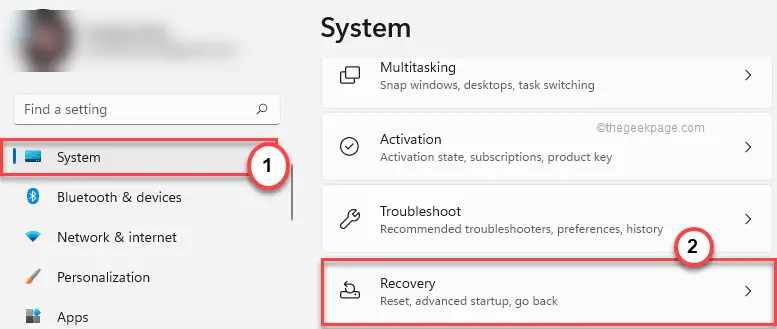
1. Press the Tecla de Windows + I keys together to open the Settings screen.
2. Then click on «System“In the left panel.
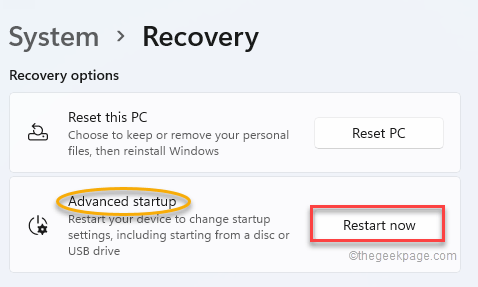
3. Then touch «Recovery” On the right side.
4. Now, tap on the «Advanced startup“.
5. In addition, click on «Restart now” for restart your computer in the Windows recovery environment.

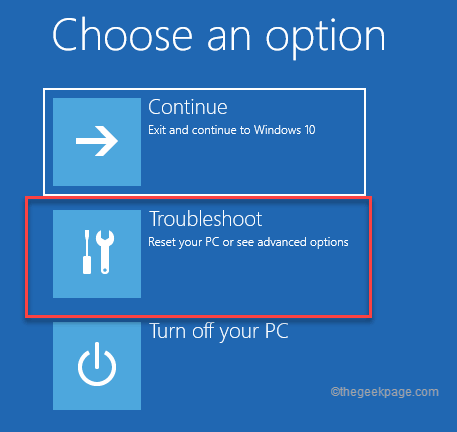
Your computer will be in the Automatic Repair window. Now, follow these next steps.
1. Then click on «Solve problems“.
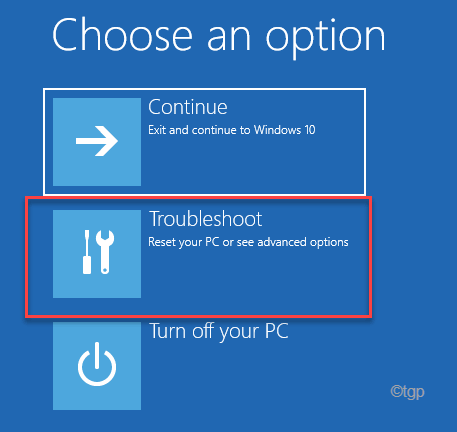
2. Also, tap on the «Advanced Options”For additional options.
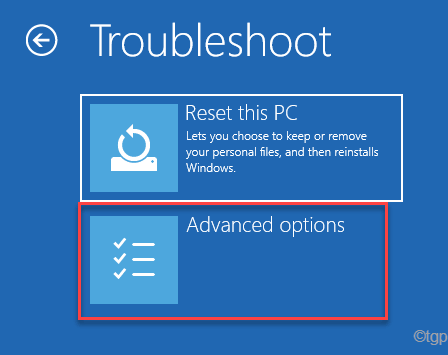
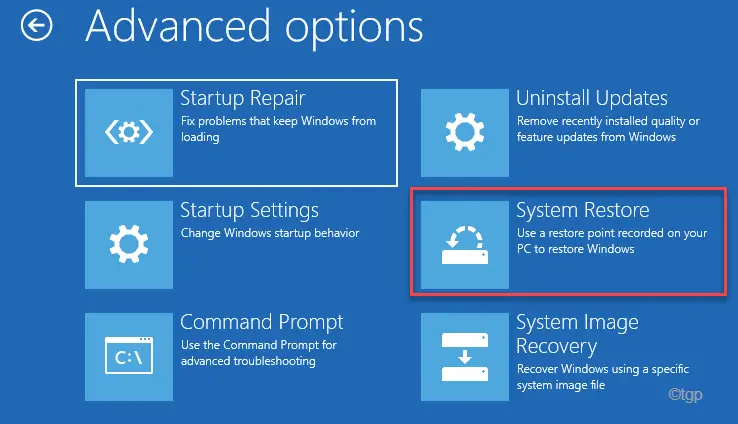
4. Now, tap on the «System restore”To open the System Restore page.
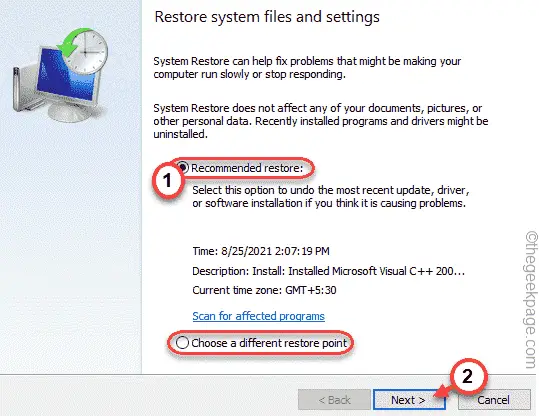
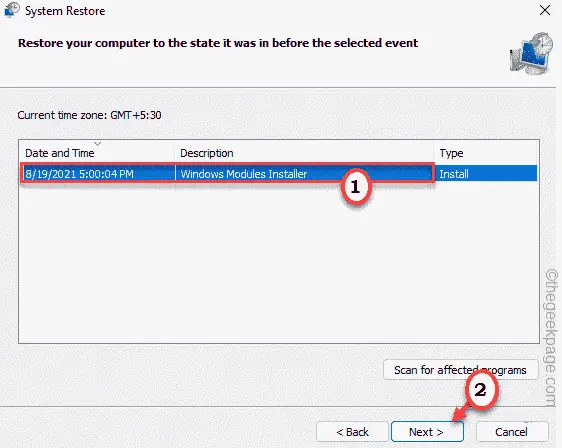
5. In the System restore window, you can use the “Recommended Restore” or you can also choose the “Choose a different restore point»Option.
Then touch «next” to proceed.
6. Now choose a restore point that you want to prefer.
7. After that, tap «next“To continue with the next step.
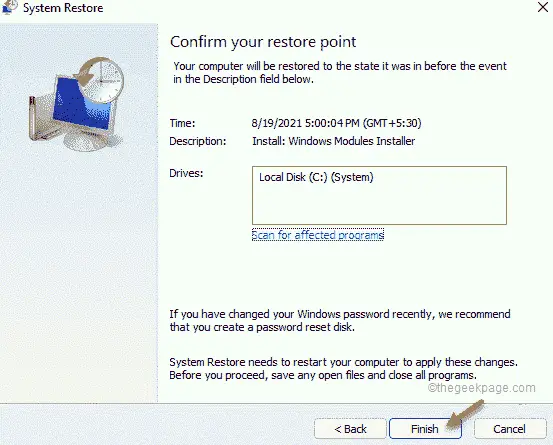
7. Finally, touch «End up”To finalize the process.
This time, System Restore should work without any interference from others.
Solution 3: run SFC and DISM scans in safe mode
You should perform a system file verification scan in safe mode.
Paso 1
1. Press the Tecla de Windows + I keys together.
2. Then tap «System”In the left panel.
3. Later, tap «Recovery” On the right side.
4. Then touch «Restart now”In the ‘Advanced startup’ section.
Once your machine restarts, you will be in the recovery environment.
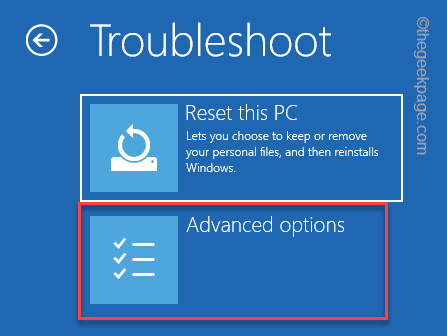
5. Then tap «Solve problems“To access it.
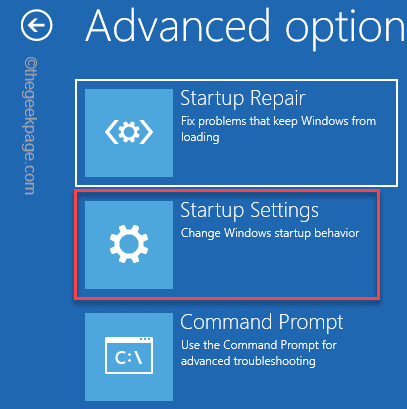
7. Then tap on the «Advanced Options“.
8. Then tap on the «Startup settings“To continue with the next step.
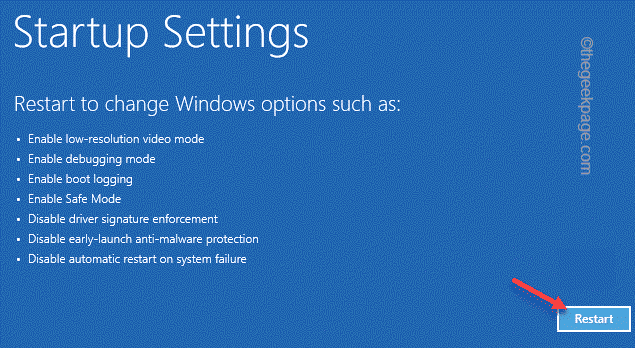
9. Finally, click on «RestartAnd your system will reboot into safe mode.
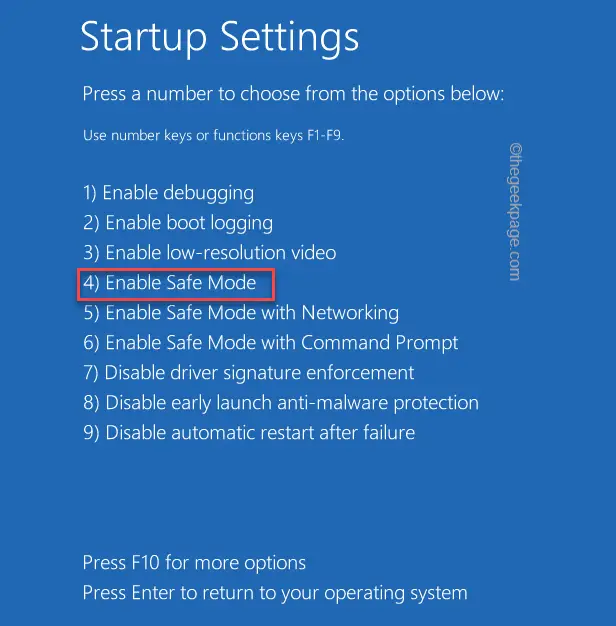
10. Simply press the F4 from your keyboard to click on the «Enable safe mode»Option.
Paso 2
Once your computer boots into Safe Mode, follow these steps:
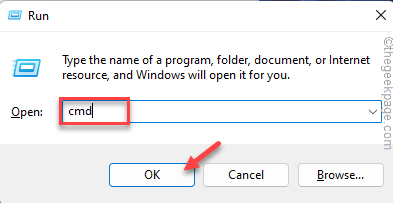
1. At first, press the Tecla de Windows + R keys together.
2. Then write «cmd«And press Ctrl + Shift + Enter keys together to access the terminal with administrative rights.
3. At the beginning, we run the DISM analysis. Writes this command and hit Get into.
DISM.exe /Online /Cleanup-image /Restorehealth
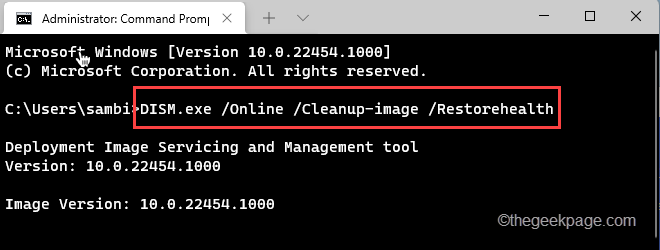
Let Windows complete the DISM scan.
3. After running the DISM scan, catch this command and hit Get into to run an SFC scan.
sfc /scannow
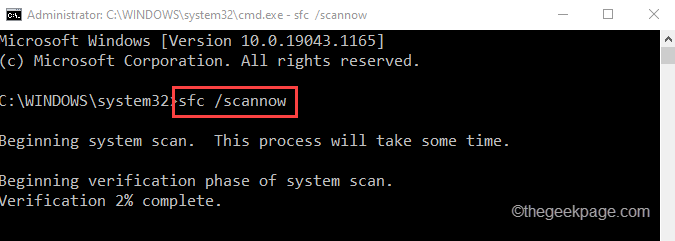
Let Windows fix this problem during these reviews. Close the command prompt window.
Related posts:
 How to access Steam games without an internet connection
  How to view FPS with Xbox Game Bar in Windows 10: Steps Made Easy
  Hacked account? How to check and remedy
  How to make video calls from WhatsApp Web
  How to increase the RAM memory of a desktop or laptop + Tips and Tricks
  How to organize your YouTube subscriptions into categories
+ Tips and Tricks
How to organize your YouTube subscriptions into categories
+ Tips and Tricks


