


How to auto-complete sequential data using fill strings in Microsoft Excel
When it comes to Microsoft Excel, there is a lot of data involved, numbers, days, more numbers, the list is endless. It’s almost impossible to get all your Excel tasks done without some kind of automation. One of the most important automation tricks someone could need is the automatic generation of series of numbers. Well, there is the classic way of entering the first 3 numbers in 3 cells of a single column and then dragging the values to autocomplete the rest of the series in the cells that we select. Well, who likes to stick to the classic way all the time?
In this article, we present the filler series functionality in Excel, with which you can do wonders with the generation of series.
How to use the padding series functionality in columns
Paso 1: Click on A cell and enter the starting number of your series.
In the example below, I clicked on cell D1 and entered the number 20.
Paso 2: Then you must select the cells where you want the rest of your series to be generated. This can also be an entire column or a continuous selected range of cells in a column.
Now make sure you’re in the HOUSE tab.
At the far right of the HOUSE ribbon, you will find a button called Fill in. Click on it first and then click on the option called Serie.

Paso 3: At Serie window that opens next, enter the range end value of your series in the text field called stop value. For example, if your series is from 20 to 40, the number you must enter in the stop value field is 40.
Hit the OK button.

Stage 4: That’s it. Now you can see that your series is automatically generated in the range of columns you selected.

How to use the fill series functionality in rows
The steps to generate a series in rows are also similar to those for columns. Follow the steps below to easily achieve this.
Paso 1: Click on the cell where you want your series to start from and enter the starting number of your series within the cell.
Now select continuous cell rangein a single row, where you want your series to be generated.
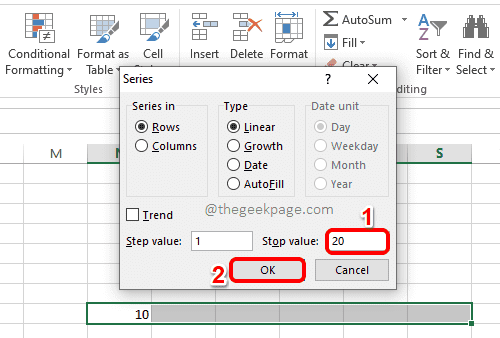
Then on the far right of the HOUSE ribbon click Fill in drop-down menu and then click the Serie option.

Paso 2: Now in the Serie window, as was done for the columns, enter in the stop value for Rows. Hit the OK button once done.
The Stop value is the value at which your series would stop. For example, if you have selected 30 cells and given the start value as 10 and the end value as 20, only 10 cells will be filled and the series will be 10,11,12,13…19,20.
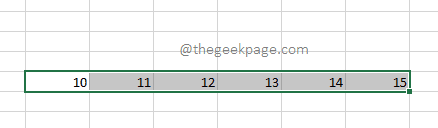
Paso 3: There you go! You will now see the automatically generated series in the range of rows you have selected.
I hope you had fun exploring the filler series functionality in Microsoft Excel. Thank you for reading.
Related posts:
 How to access Steam games without an internet connection
  How to view FPS with Xbox Game Bar in Windows 10: Steps Made Easy
  Hacked account? How to check and remedy
  How to make video calls from WhatsApp Web
  How to increase the RAM memory of a desktop or laptop + Tips and Tricks
  How to organize your YouTube subscriptions into categories
+ Tips and Tricks
How to organize your YouTube subscriptions into categories
+ Tips and Tricks


