


How to test your Android charger – Take a look at these tips, tricks, and solution you can use to make your life much easier with your devices whenever problems arrive and complications which you may find difficult to deal with.
If the phone battery is slow to charge, you are probably using a poor quality generic charger, it is a charger that offers little output current (this information can be seen on the charger chassis: something similar to Output: 700mA) or the cable is bad.
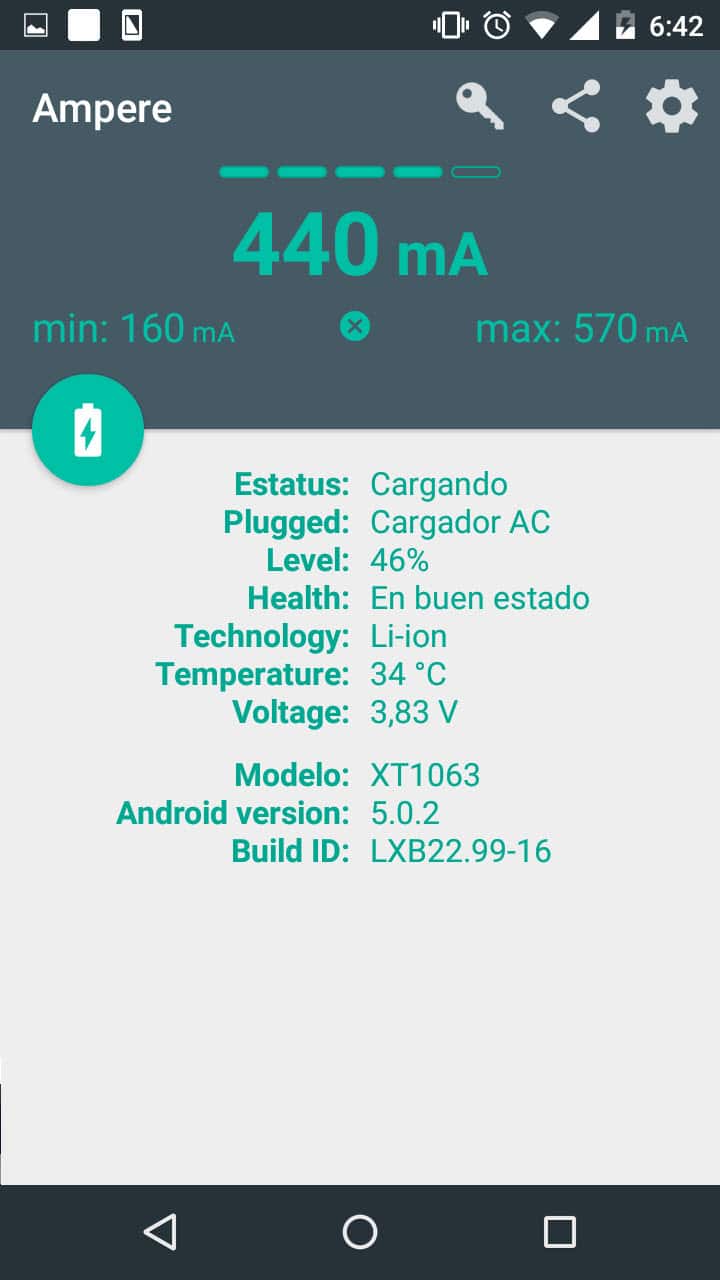
That charger can be tested with the app Ampere para Android. You just have to connect the phone to the charger and see the value that the application shows.
That value is the amount of current that the charger is charging the battery with. The higher this value, the faster the battery will charge, so it will all be a matter of using another charger that indicates a higher value to speed up charging.
Battery charging current (phone connected to charger)
This is the most interesting use that can be given to Ampere, but with this application you can also check something else: see if the output current indicated by the manufacturer is the real one (the “Output” indicated above).
For this, you just have to add the value indicated by the application when the phone is connected and disconnected from the charger, that is, the value in green plus the value in orange (ignore the negative sign in the latter).
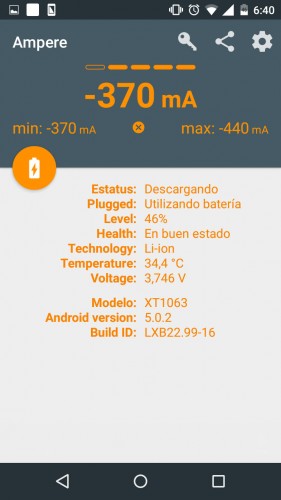
Current the phone is consuming (charger disconnected)
This sum should be equal to (or at least approximate) the output current value indicated by the manufacturer. For example, if the charger has a output 700 mA and the application indicates a value of -300 mA when the phone is disconnected from the charger (charge consumed by the phone), then the application should show a value of 400 mA when it is plugged into the charger (dedicated charge for the battery) . 300 + 400 = 700.
If this is not true, there may be two possibilities: surely it is a poor quality charger, or this sum cannot be the same because the charger is of much greater capacity than what the phone can accept. In this case, the battery charge value (green) will only reach a certain limit and when added together with the charge consumed by the phone (orange) the result will not be equal to the total provided by the charger.
Ampere does not offer exact values, but the approximate information it indicates is enough to test chargers and keep the fastest one.
It works for devices with Android 4.0.3 or higher versions. It does not work on all devices, because on certain Android phones there is no appropriate support to make these measurements, as indicated by the developer. In case of problems and inconveniences, the download page of the application (mentioned above), has all the information about this and other details.
Note: if the application indicates a value of 0mA, go to Settings (by tapping on the gear button at the top), choose “Basic Settings” and there activate the “Enhanced Measurement” box.
Related posts:
 How to access Steam games without an internet connection
  How to view FPS with Xbox Game Bar in Windows 10: Steps Made Easy
  Hacked account? How to check and remedy
  How to make video calls from WhatsApp Web
  How to increase the RAM memory of a desktop or laptop + Tips and Tricks
  How to organize your YouTube subscriptions into categories
+ Tips and Tricks
How to organize your YouTube subscriptions into categories
+ Tips and Tricks


