


Transfer photos from iPhone to MacBook Air
This article explains how to transfer photos from your iPhone to your MacBook Air.
What is the easiest way to transfer photos from iPhone to MacBook Air?
The easiest way to transfer photos from your iPhone to your MackBook is to make it automatic. You can do this by setting up iCloud sync, which will allow you to access your entire phone photo library from your laptop. And once set up, the shared library will update with each new photo.
Note: iCloud sync has its limits. You have a maximum of 5GB of cloud storage to start with and you’ll need to pay for a larger plan if you want to handle more data. For the sync to work, your iPhone must be connected to your MacBook.
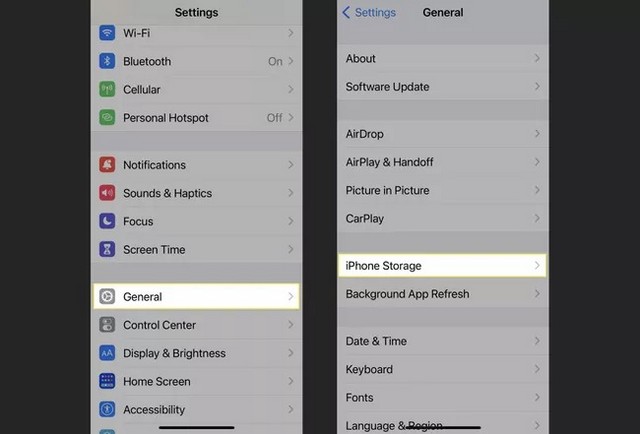
1. Open menu Settings on your iPhone, then scroll down and tap General.
2 in Generallean on iPhone storage.
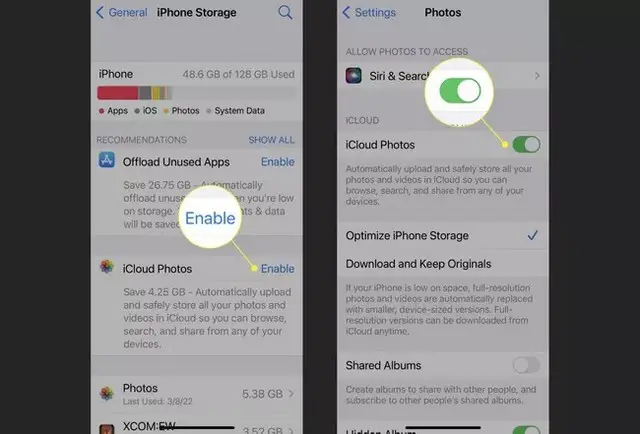
3. Find menu option iCloud photos and touch Activate, then touch Enable iCloud Photosto confirm.
4. Where you can go Settings > Photosthen enable iCloud photos.
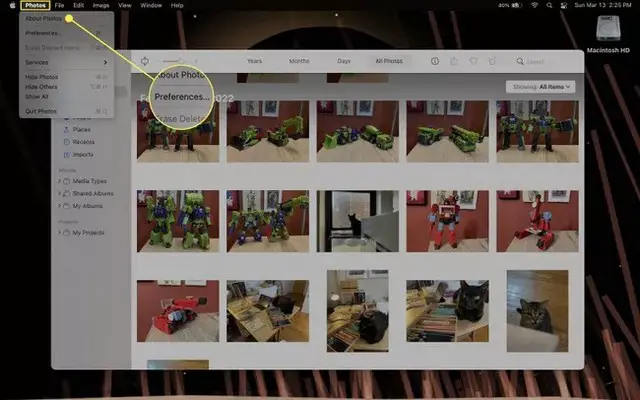
5. On your MackBook, open the app Images. If you haven’t used it before, it will ask if you want to enable iCloud, and you just need to allow it.
6. If your Photos app doesn’t offer you the option at startup, or if it’s disabled, click Images in the menu bar at the top of the screen, then click preferences.
7. Click on the tab iCloudthen check the box next to iCloud photos to turn on sync.
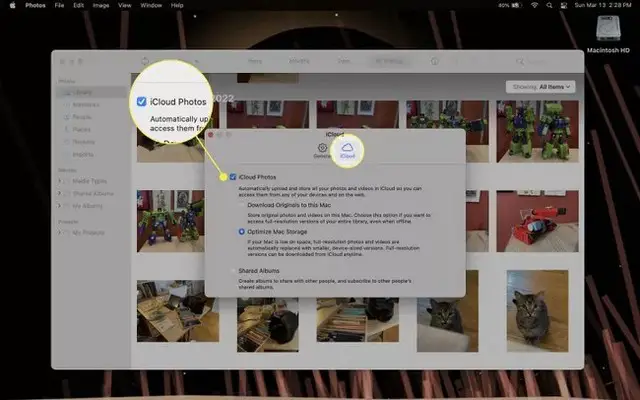
8. Depending on the size of your photo library, it may take a while to fully sync between your devices, but that’s it! Now any photo you take with your iPhone will automatically appear in the Photos app library on your MacBook.
How do I import photos to my MacBook Air?
The second easiest way to transfer photos between your iPhone and MacBook is through AirDrop. This allows you to select specific images or videos and transfer them individually or in batches, giving you more control over what goes where.
Note: For AirDrop to work, you need to make sure your MacBook and iPhone have Wi-Fi; otherwise they cannot be found.
1. Open the Photos app from your iPhone, then open the photo album you want to transfer photos from.
2. You can tap a single photo and start the transfer from there, or if you want to transfer multiple images, tap Select at the top of the screen, then tap all the photos you want to copy. Alternatively, if you want to select multiple images adjacent to each other, you can also tap and drag on all of them.
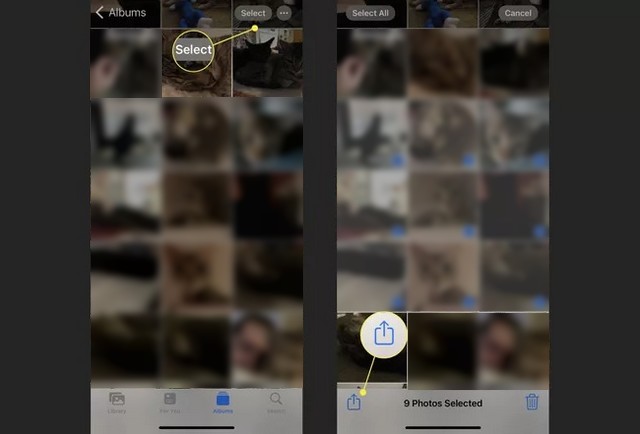
3. Tap the icon share, distribute in the lower-left corner of the screen (it looks like a box with an arrow pointing up).
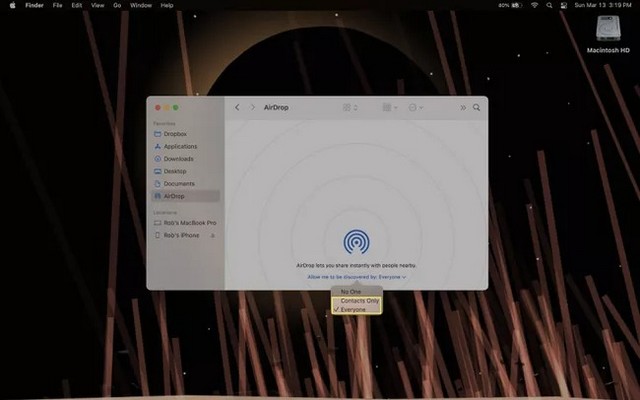
4. In the menu share, touch Airdrop, then select the device you want to transfer the photos to. Depending on your AirDrop settings, you may need to click To accept on your MacBook for the transfer to complete.

5. Once the process is complete, the transferred photos should appear in the folder. Downloads from your MacBook.
How do I import photos to my MacBook Air?
Another straightforward (albeit slightly slower than AirDrop) option for transferring photos between your devices is to physically connect your iPhone to your MacBook using your smartphone’s charging cable.
Note: Depending on your iPhone and MacBook model, your Lightning cable may not be able to connect, in which case you’ll need an adapter.
1. Connect the Lightning cable to your iPhone as if you were going to charge it, but remove the power adapter from the other end and connect the other part of the cable to your MacBook. You may need to unlock your iPhone for a full access connection.
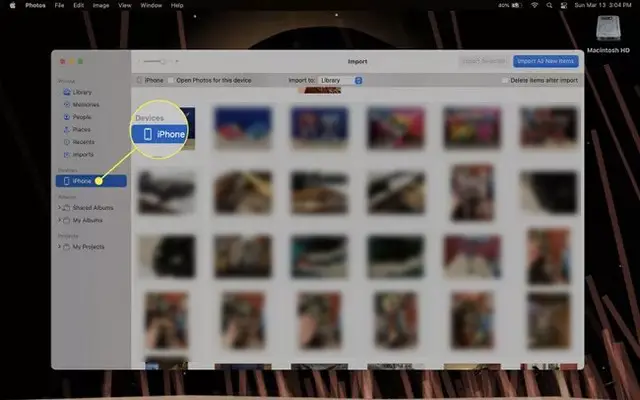
2. Open the app Images on your MacBook and click iPhonein the section devicesin the sidebar.
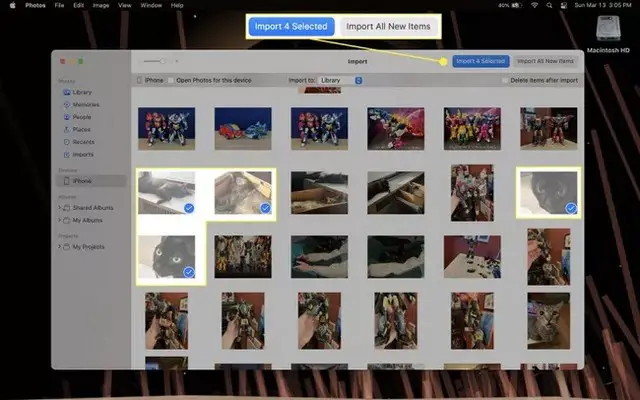
3. Click the photos you want to select for copying, or click and drag to select multiple photos at once, then click Import Selection to start the transfer. Or if you want to transfer everything, click Import all new items.
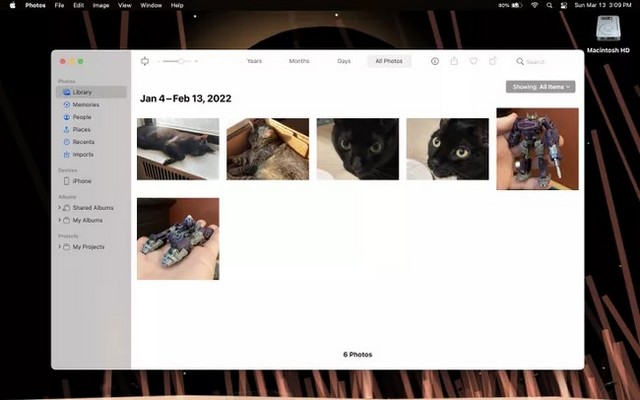
4. Imported photos will now appear in both the category importsand in you library.
Why can’t I transfer photos from iPhone to MacBook?
There are several reasons why you may be having problems with photo transfers.
1. If you are using AirDrop, make sure your iPhone and MacBook settings are set to Only contactsor in all the world. If Contacts Only isn’t working, everyone should. If it still refuses to work, try toggling between the two options once or twice or restart both devices.
2. If you connected your iPhone to your MacBook with a Lightning cable and they don’t recognize each other, try disconnecting and reconnecting the cable. If that doesn’t work, try rebooting one or both devices.
3. If iCloud sync is not working, the option may be disabled for one or both devices. Go back to their respective menus to check again. If iCloud is on but still not working, go to Settings on your ID de apple on any of your devices and make sure they’re connected.
If you have any questions or suggestions, let us know in the comments. Also, check out this guide as well if you want to learn how to transfer photos from computer to iphone.
Related posts:
 How to access Steam games without an internet connection
  How to view FPS with Xbox Game Bar in Windows 10: Steps Made Easy
  Hacked account? How to check and remedy
  How to make video calls from WhatsApp Web
  How to increase the RAM memory of a desktop or laptop + Tips and Tricks
  How to organize your YouTube subscriptions into categories
+ Tips and Tricks
How to organize your YouTube subscriptions into categories
+ Tips and Tricks


